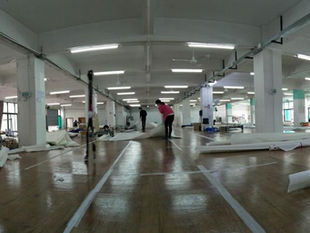
Did you ever wonder how your sail is made? Let us run you through the process so we can help you understand the journey your sail goes through before it reaches your boat.
Sail Design – Nesting – Cutting – Seaming – Broadseaming – Stitching – Tapes and Reinforcement - UV Hemming and Stitching – Finishing – Customisation – QC and Measuring - Cleaning – Packing – Shipping
Sail Design We have a huge array of sail designs on file for the vast majority of “standard” boats. Our software allows us to save rig data on each of these boats to ensure our sails will fit perfectly. During the design process we’ll ask you a few questions to make sure that our data will fit with your boat. If we need to double check anything we may ask you to take some simple measurements or we’ll send you some dimensions which you can quickly confirm will work for your boat.
Nesting Once Design is complete we will separate each panel and patch and use a nesting software to carefully control the orientation of the panels to ensure they are aligned correctly with the fibres in the sailcloth for optimal performance and strength.
Cutting When the nesting is complete this information is sent to our Computer controlled cutting table which accurate cuts the sailcloth as well as marking the panel numbers and the position of seams, draft stripes, batten, windows and other features on the panels. Our cutting staff will also inspect the cloth before cutting to make sure no defects will be present in the cut panels and patches.
Seaming After cutting we assemble the parts like a giant jigsaw puzzle an seam them together using a specialised tape in preparation for stitching.

Broadseaming
Once the seams have been stuck we will begin to assemble the sail by stitching the broadseams and or panels together. Using a triple zig zag stitching machine for maximum strength on these major joins.
Stitching
After the broadseams are complete we will go about stitching the rest of the sail including the patches, additional panels, belts and reefs on pure state of the art zigzag machines.

Tapes and Reinforcement When the sail body and patches have been stitched together we go on to add the tapes to the foot, luff and leech whilst adding any bolt rope of lufftape required.
UV and Hemming If the sail requires UV we will cut and hem this prior to stitching it to the sail. We are meticulous about hemming the UV before stitching it as it prevents the UV from fraying or becoming damaged. Many other overseas loft will skip this stage.
Finishing At this stage we will add any hardware, grommets or SR rings and webbing which is required on the corners, reefs or luff of the sail. We will also add the leech and foot lines as well as any necessary cleats. We will also added batten pockets and prepare the battens according to the design file.

Customisation Once the sail is complete we will apply any custom sail numbers or insignias which have been specified by the clients. We will also add the necessary tell tales to the sail.
QC and Measuring After the sail is complete our QC manager will measure the dimensions of the sail as well as confirming the locations of the battens, draft stripes, windows, reefs. He will then ensure all the hardware matches with what has been specified for this sail. A final inspection will ensure that the sails meets with our QC standards. Did you know we take a QC video of each of our sails as a reference and so that you can if you wish see your sail before it even leaves our loft!
Cleaning The sail will then be cleaned and any loose threads cut away to ensure the sail is looking at its crisp, fresh best when you receive it.
Packing Once this whole process the sail will be packed into its own protective sail bag before being placed in a reinforced carboard box. At this stage we also include any extras such as spreader patches, Velcro straps, pennants are included in the box.

Shipping The sails will then be shipped by DHL, FEDEX or UPS to your desired location and a tracking number will be sent to your email.


